Certificates

Certificates

What Type of Lighting Is Best for Museums?

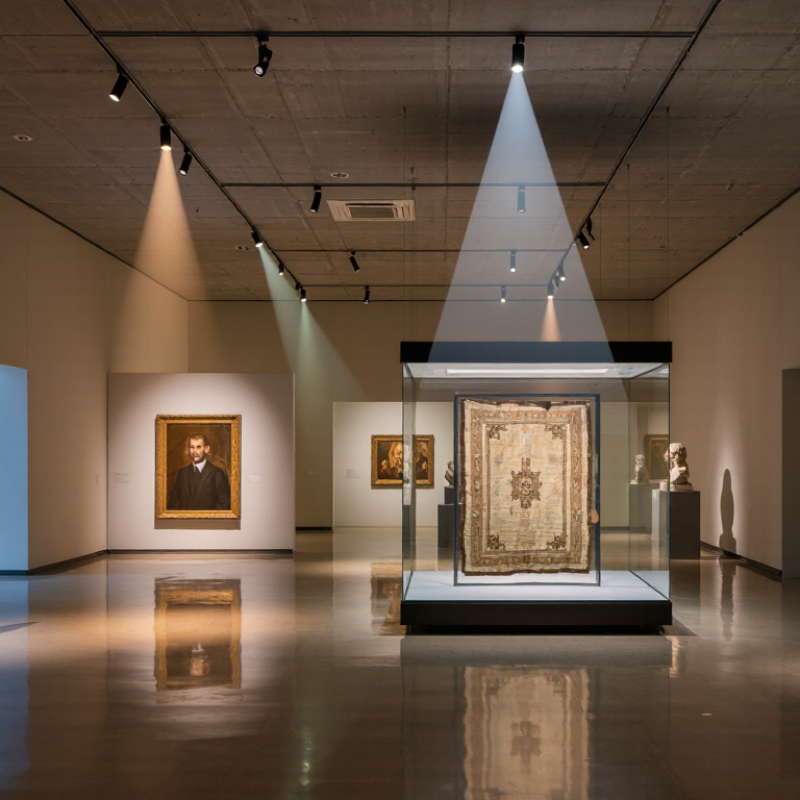
What type of lighting is best for museums? The answer is rarely one fixture or one color temperature. Effective Museum Lighting makes objects legible while limiting unnecessary exposure. It also considers glare, visitor comfort, accurate color, and the character of each gallery. A painted portrait, a faded textile, and a stone sculpture do not share the same needs.

Conservation guidance gives curators a practical starting point. CIE 157:2004, Control of Damage to Museum Objects by Optical Radiation, outlines how light exposure can contribute to deterioration. Common museum guidance limits highly light-sensitive works, such as works on paper and textiles, to around 50 lux; less sensitive objects may tolerate higher levels. These are planning benchmarks, not universal settings. The object’s condition, display duration, and cumulative exposure matter too. The trade-off is real. As conservation scientist Stefan Michalski has stated, “Light damage is cumulative and irreversible.” Even careful lighting cannot undo past exposure.

This guide compares LED sources, beam control, color quality, ultraviolet management, and layered lighting strategies. It draws on the Illuminating Engineering Society’s RP-30-20, Lighting for Museums and Art Galleries, alongside CIE conservation guidance. The goal is not simply a brighter room. It is a gallery where visitors can notice the brush texture, read the label, and still see the work as intended. Some recommendations will need adjustment in practice; a standard cannot anticipate every wall, object, or viewing distance.

What Type of Lighting Is Best for Museums?

Define Museum Lighting by Conservation Risk, Not Brightness

Museum lighting is best judged by the risk it creates for each object, not by how bright a room feels. A pale textile, watercolor, or handwritten document may change before visitors notice. Damage accumulates. The practical question is not simply whether an object is visible, but how much light exposure it can tolerate. Conservators consider its materials, condition, and planned display time before choosing a lighting level.

Illuminance, measured in lux, matters, but so does exposure duration. A modest light left on all day can cause more cumulative damage than brief viewing under stronger light. Measure illumination at the object’s surface, not just across the gallery. UV filtering helps, but it does not stop all fading. LEDs can reduce heat and offer control, yet their spectrum and placement still deserve attention. No fixture makes a sensitive object risk-free.

Controls should reflect the collection. Rotate vulnerable works, use timed lighting, and record exposure where practical. A visitor may find a dim case frustrating; raising the level can feel like an easy fix. It is not always the right one. I would rather adjust the viewing experience than quietly spend an object’s limited light budget. Even then, display choices involve trade-offs, and the record should say so.

What Type of Lighting Is Best for Museums? Define Museum Lighting by Conservation Risk, Not Brightness
Conservation risk Typical materials or objects Common illuminance guideline Exposure considerations Practical lighting approach
High sensitivity Watercolors, works on paper, photographs, textiles, dyed materials, manuscripts, and many natural-history specimens About 50 lux or less at the object Light damage is cumulative and generally irreversible. Track total exposure in lux-hours, not just the momentary lux level. Use low, even illumination; limit display duration; switch lights off when galleries are unoccupied; consider rotation and daylight exclusion.
Moderate sensitivity Oil paintings, many painted surfaces, undyed wood, bone, and some composite objects Often around 150 lux, subject to condition and material assessment Paint, coatings, adhesives, and previous restoration can change an object’s sensitivity. Assess the complete object rather than its broad category alone. Use controlled, well-aimed lighting and avoid unnecessary exposure. Set levels with a conservator’s assessment and monitor them at the object surface.
Low sensitivity Stone, ceramics, glass, and many metals without light-sensitive coatings or attached materials Up to about 300 lux may be suitable in some displays The object may tolerate more light, but pigments, labels, coatings, and attached organic components may remain sensitive. Use higher levels only where object condition and viewing needs justify them. Check for heat, glare, reflections, and damage to nearby sensitive objects.
Potentially light-sensitive or mixed-material objects Composite objects, objects with unknown pigments or coatings, and items with uncertain treatment histories Begin conservatively; a universal lux limit cannot be assigned without assessment Uncertainty itself is a reason for caution. Visible light can cause fading even when ultraviolet radiation is minimized. Seek conservation advice, use the lowest practical level, reduce display time, and review the object’s condition periodically.
Ultraviolet control All collections, especially organic and dyed materials Eliminate UV where practicable; a commonly cited upper limit is 75 µW/lm UV is only one part of light risk. A low UV reading does not make prolonged visible-light exposure harmless. Specify UV-filtering or low-UV sources and glazing where appropriate, then verify performance with measurement rather than relying on product descriptions.
Daily operating control Galleries, cases, and temporary exhibitions Measure illuminance in lux at the object’s position For example, 50 lux for 2,000 display hours equals 100,000 lux-hours. Equivalent lux-hour totals can still have different effects depending on the material and exposure conditions. Use timers, occupancy controls, dimming, shutters, or scheduled lighting where suitable. Record settings and exposure periods for review.
Guidance note: The figures above are commonly used planning guidelines, not universal safety guarantees. Final levels should be set by a qualified conservator based on the object’s materials, condition, display duration, and viewing requirements. Measure light at the object; do not use brightness alone as a measure of conservation risk.

Set Illuminance by Material Sensitivity: 50, 150, or 300 Lux

Light levels should follow material sensitivity, not room brightness. Use about 50 lux for watercolors, paper, dyed textiles, and other fugitive pigments. Their colors can fade under repeated exposure, even when each visit seems harmless. For moderately sensitive objects, such as oil paintings with stable pigments, 150 lux may be a practical ceiling. Stone, metal, and many ceramics can often tolerate 300 lux, provided heat and ultraviolet radiation are controlled. These are working targets, not guarantees; an object’s condition and past exposure matter.

The Canadian Conservation Institute’s guidance explains that light damage accumulates with exposure, while CIE 157:2004 addresses controlling damage through optical-radiation limits. The arithmetic makes the trade-off visible: 2,000 hours at 50 lux equals 100,000 lux-hours; at 300 lux, it equals 600,000. That matters. Use a calibrated lux meter at the object surface, not at the doorway, and record readings as displays change. A sunlit patch can push exposure far above the intended level by midday. Rotate vulnerable works or shorten display periods when possible. In practice, 150 lux can feel dim to visitors, and raising it may seem tempting. Test the viewing experience before changing the setting.

Choose UV-Controlled LEDs and Keep UV Below 75 μW/Lumen

What Type of Lighting Is Best for Museums?

UV-controlled LEDs are a practical choice for museum galleries because they can provide stable, controllable light with very low ultraviolet output. Still, “LED” does not automatically mean UV-safe. Ask for measured spectral data, and keep ultraviolet radiation below 75 μW per lumen at the display surface. Measure, don’t guess. A standard lux meter cannot confirm UV levels; use suitable UV-measuring equipment or consult a conservation lighting specialist.

The limit is one part of a careful plan, not a promise that an object cannot fade. Light-sensitive works on paper, textiles, and pigments may need lower illumination and shorter display periods. Set fixtures to avoid hot spots on labels and delicate surfaces, then check readings where objects actually sit. A dimmer can help, but it should not replace measurement. UV still matters.

Review the setup after changing lamps, filters, or fixture angles. Keep a simple record of UV readings, illuminance, and operating hours; it makes gradual changes easier to spot. There is some uncertainty, too: materials respond differently, and a single threshold cannot capture every risk. That deserves attention. Pair UV control with conservative light levels, limited exposure, and advice from a qualified conservator.

What Type of Lighting Is Best for Museums? — Choose UV-Controlled LEDs and Keep UV Below 75 μW/Lumen

Museum lighting guidance values for ultraviolet radiation relative to visible light

How to read this: Keep UV below the commonly cited ceiling of 75 μW/lm. For especially light-sensitive objects, a more stringent target near 10 μW/lm may be appropriate. UV-controlled LEDs generally produce very little UV, but actual output varies by fixture; verify it with measurement and consult a conservator.

Balance Color Rendering, Beam Control, and Visitor Visibility

Museum lighting works best when color accuracy, beam control, and visitor visibility are balanced. A high color-rendering score can help visitors distinguish paint, paper, and fabric tones, but it does not guarantee faithful color on its own. Check samples under the actual light source. There is no universally perfect setting.

Control the beam to keep light on the object, not across a glazed case or into a visitor’s eyes. Use shielding and careful aiming to reduce glare on glass and bright patches on nearby walls. For light-sensitive paper and textiles, many displays use about 50 lux as a practical limit. CIE 157:2004 and IES RP-30-20 both address managing exposure according to material sensitivity. Their guidance reinforces an important point: exposure accumulates, so lux readings alone do not tell the whole story. Small shifts matter.

Tips: Test color rendering with real collection materials, then check the view from seated and standing positions. Dim ambient light only as far as visitors can still read labels safely. Recheck after installation; a well-aimed beam can drift, and glare is easy to miss on an empty gallery floor.

Reduce Cumulative Exposure with Dimming, Timers, and Rotation

Museum lighting should protect objects even when galleries are open. The Canadian Conservation Institute recommends about 50 lux for highly light-sensitive materials, such as watercolours and textiles, and 150 lux for moderately sensitive objects. These are illuminance levels, not guarantees of safety. The CIE’s 157:2004 report explains why cumulative exposure matters: damage builds with the light received over time, often tracked in lux-hours.

Dimming helps keep light near the level needed to view an object. Timers can switch off display lighting outside visiting hours, while occupancy sensors can shorten unnecessary exposure. For example, a textile case might remain dim when a gallery is empty, then brighten modestly when visitors approach. Staff should check settings and record operating hours; a timer left on manual mode can quietly undo the plan. Small details matter.

Rotation gives vulnerable works scheduled rest in dark, controlled storage. It does not reverse fading already caused, and it is not a cure. A rotation schedule should reflect each object’s sensitivity and past exposure, rather than treating every work alike. The CCI’s lux guidance is useful, but actual conditions vary across a case: measure near the object, not only at the doorway. Even careful controls need review. A sunlit patch can shift with the season.