| Vehicle Mounting Location | Select by Installation Area | Roof, windshield pillar, grille, bumper, hood, and bed-rail brackets are designed for different attachment points. Roof and pillar mounts generally provide a higher beam position, while bumper and grille mounts offer a lower forward-facing installation. | Check available mounting holes, clearance, access to fasteners, and whether drilling is permitted. |
| Light Bar Length | Match the Bar Width | Common light-bar lengths include approximately 6, 12, 20, 30, 40, 50, and 52 inches. Adjustable universal brackets can accommodate a range of widths, but the adjustment range must include the light bar’s mounting points. | Measure the center-to-center distance between the light bar’s mounting holes rather than relying only on the overall bar length. |
| Bracket Material | Coated Steel or Aluminum | Steel brackets usually provide high rigidity and impact resistance. Aluminum brackets are lighter and naturally resistant to corrosion. A protective powder coating or anodized finish can improve resistance to moisture, road salt, and UV exposure. | Review material thickness, surface treatment, edge quality, and resistance to the intended operating environment. |
| Load Capacity | Use a Safety Margin | The bracket should support the complete light assembly, including the lamp, hardware, wiring, and any vibration loads. A practical selection should provide capacity above the static weight of the installed light bar. | Compare the stated bracket capacity with the light bar weight and consider wind load, off-road vibration, and repeated impacts. |
| Adjustment Range | Multi-Position Adjustment | Slotted holes and pivoting joints allow the light bar to be centered, raised, lowered, or tilted. Adjustment is useful when vehicle body shapes and light-bar mounting patterns differ. | Confirm slot length, pivot angle, adjustment direction, and whether the final position can be locked securely. |
| Fastener Compatibility | Match Bolt Size and Thread | Automotive light-bar brackets commonly use metric or inch-based fasteners depending on the vehicle and light assembly. Slotted mounting holes can improve fit, but they do not replace correct bolt diameter and thread engagement. | Verify bolt diameter, thread pitch, washer size, nut type, and the required tightening torque. |
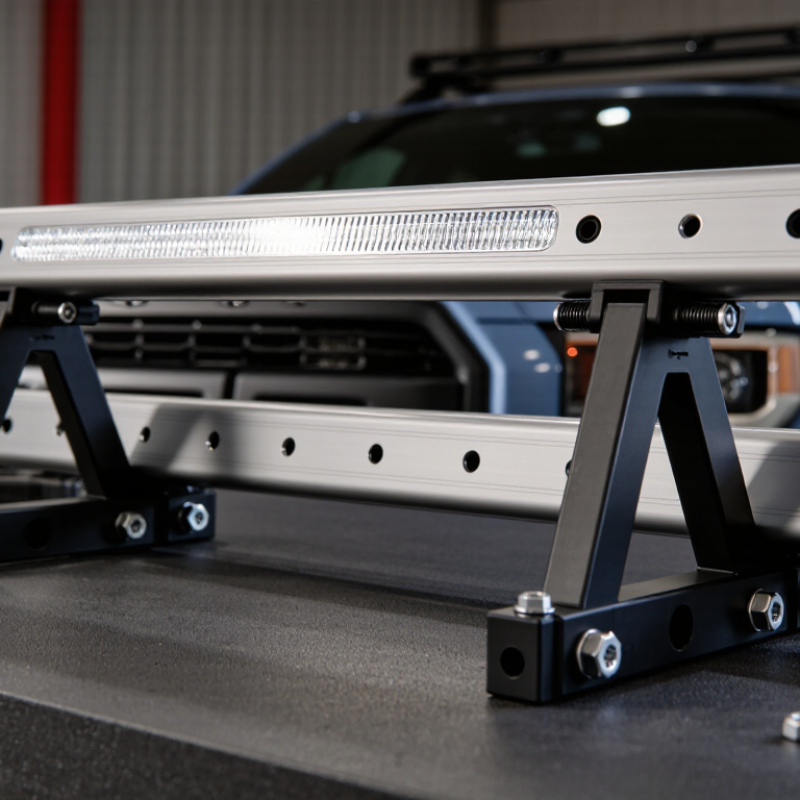
| Vibration Resistance | Reinforced and Braced Design | Triangulated supports, short unsupported spans, reinforced bends, and locking fasteners can reduce movement and fatigue. A rigid bracket helps maintain beam alignment on rough roads. | Look for reinforcement near bends and mounting holes, and use suitable locking nuts or thread-locking methods where appropriate. |
| Weather and Corrosion Protection | Outdoor-Rated Finish | Brackets exposed to rain, mud, snow, and road salt require a durable protective finish. Drainage, covered fasteners, and corrosion-resistant hardware can extend service life. | Confirm whether the coating is intended for exterior use and inspect cut edges or drilled areas for exposed metal. |
| Aerodynamic and Noise Considerations | Low-Profile Installation | A compact bracket with limited exposed surface area can reduce wind noise and aerodynamic drag. Positioning the light bar close to a suitable mounting surface may also reduce vibration. | Check roof clearance, sunroof operation, antenna location, windshield visibility, and potential airflow noise. |
| Electrical Clearance | Protect the Wiring | The bracket should not pinch, cut, or excessively bend the light bar cable. Adequate clearance helps protect insulation from sharp edges, heat sources, moving panels, and abrasion. | Plan the cable route, use edge protection where needed, and keep wiring away from exhaust components and moving parts. |
| Installation Method | Bolt-On Where Possible | Bolt-on brackets can use existing vehicle mounting points and are generally easier to remove or reposition. Drilling or permanent modification may provide additional strength but can affect corrosion protection and vehicle structure. | Determine whether the vehicle has suitable factory holes and follow the vehicle manufacturer’s structural and safety requirements. |
| Legal and Safety Requirements | Check Local Regulations | Rules for auxiliary lighting can differ by location and may cover lamp height, color, beam direction, road use, covers, and visibility to other drivers. Correct bracket positioning helps keep the beam properly aimed. | Review applicable traffic, lighting, inspection, and off-road-use regulations before installation. |



 © Copyright 2020 Tianjin Tanghaidongyang Valve Co., Ltd. All Rights Reserved.